Photoshop is one of the most powerful photo editing tools available to photographers and digital artists today. With its extensive range of tools and features, Photoshop provides users with the ability to enhance, manipulate, and create images with incredible precision and control. However, for beginners, it can be a daunting task to get started with Photoshop. In this article, we will explore some basic techniques and tools to help you get started with Photoshop and take your photo editing skills to the next level.
- Getting Started with Photoshop
Before diving into the world of Photoshop, it is essential to understand some of the basic terminology and features of the software. Photoshop is a raster graphics editor, which means that it works with pixels or tiny dots that make up an image. Photoshop uses layers to organize different elements of an image, and each layer can be edited independently.
When opening Photoshop, you will see a workspace that includes a menu bar, a toolbox, and a range of panels. The menu bar provides access to all of Photoshop’s features, while the toolbox contains all the necessary tools you’ll need to edit your photos. The panels are used to adjust settings such as color, layers, and brush settings.
- Cropping and Resizing
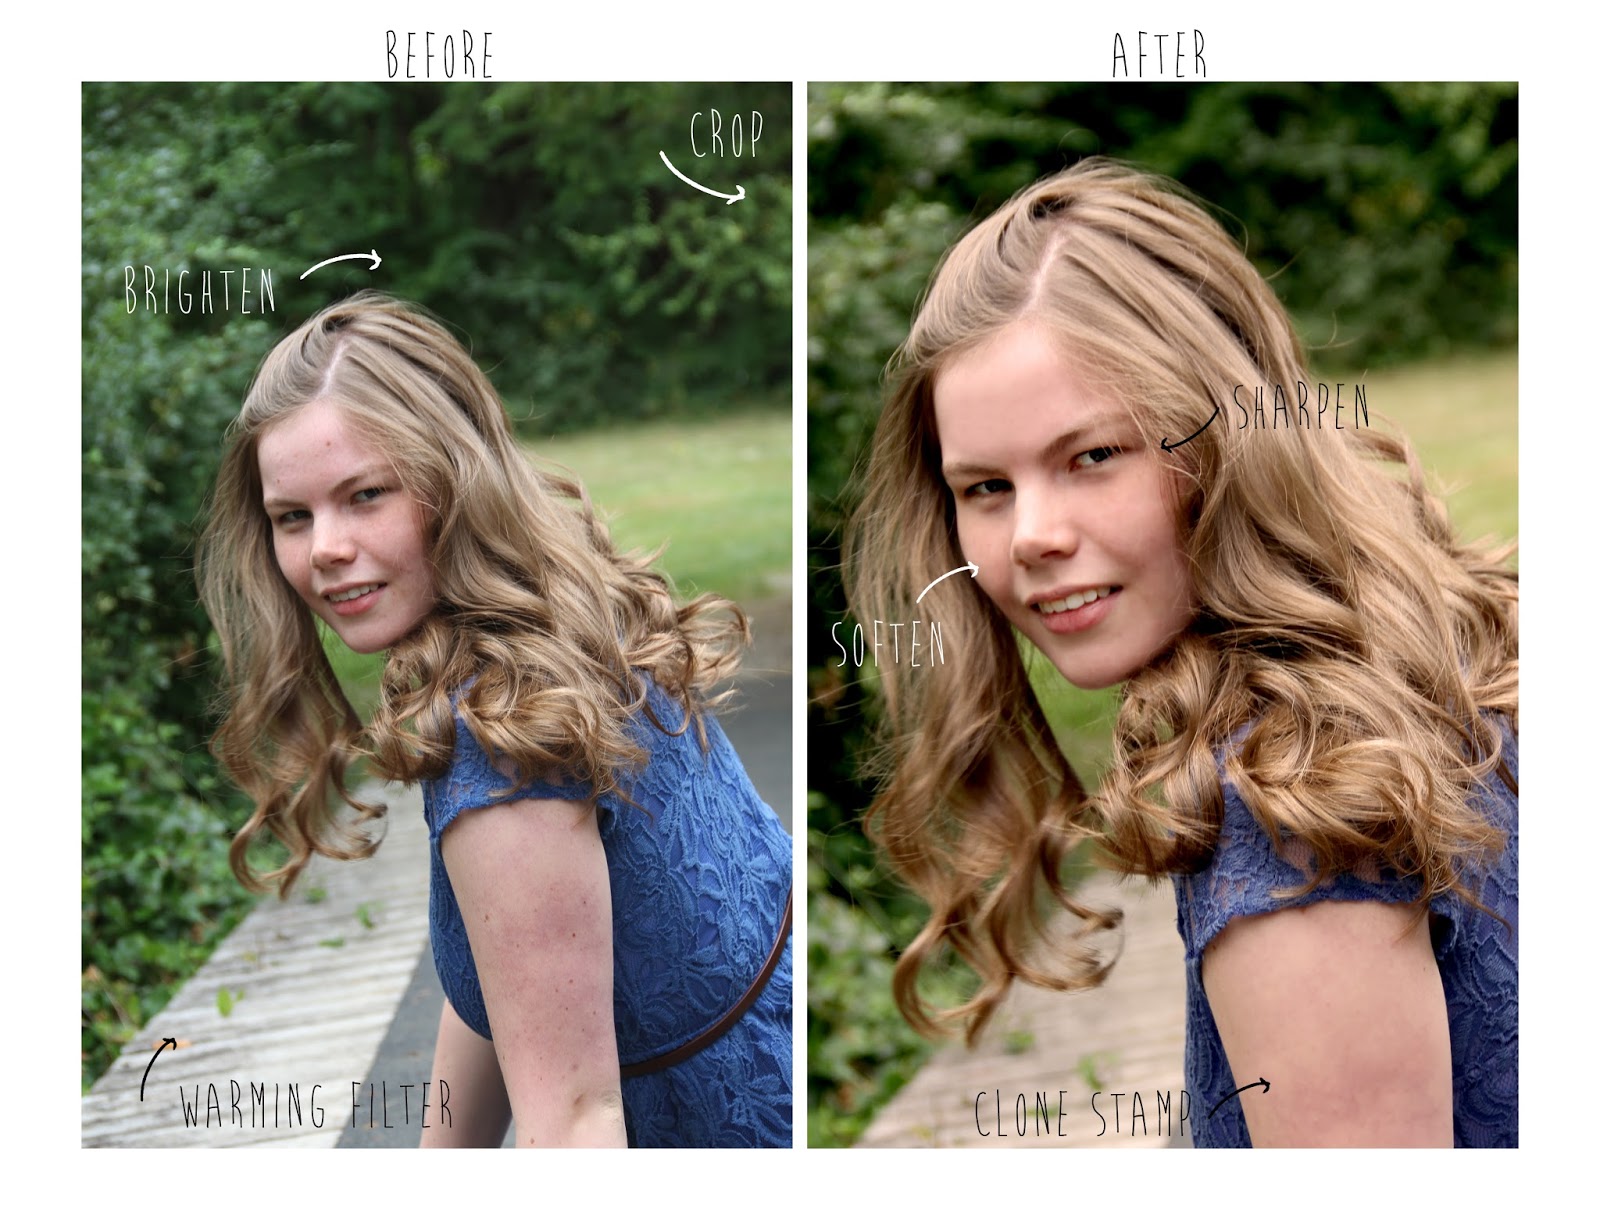
Cropping and resizing are two basic techniques that are essential to photo editing. Cropping involves removing unwanted parts of an image, while resizing changes the dimensions of the image. Both techniques can be used to improve the composition of a photo and focus attention on specific areas.
To crop an image, select the Crop tool from the toolbox and drag a box around the area you want to keep. You can then adjust the size and position of the crop box to fine-tune the composition. Once you are happy with the crop, press Enter to apply the changes.
To resize an image, go to the Image menu and select Image Size. Here you can adjust the width and height of the image, as well as the resolution. Be sure to maintain the aspect ratio of the image to avoid distortion.
- Adjusting Color and Contrast
Adjusting color and contrast is another essential technique in photo editing. Color adjustments can be used to correct color balance, enhance specific colors, or create a mood or atmosphere. Contrast adjustments can be used to increase the range between light and dark tones, making an image more vivid and dynamic.
To adjust color, go to the Adjustments panel and select the type of adjustment you want to make. For example, to adjust the brightness and contrast of an image, select Brightness/Contrast. Here you can drag the sliders to adjust the brightness and contrast of the image.
To adjust color balance, select Levels from the Adjustments panel. Here you can adjust the levels of the image’s shadows, midtones, and highlights to achieve the desired color balance.
- Working with Layers
As mentioned earlier, layers are an essential component of Photoshop. Layers allow you to work with different elements of an image independently, making it easier to edit and manipulate an image. For example, you can add text to an image on a separate layer, allowing you to edit the text without affecting the rest of the image.
To create a new layer, click on the New Layer icon at the bottom of the Layers panel. You can then drag and drop elements onto the new layer. To edit a layer, select the layer you want to edit and make changes as desired.
- Retouching and Restoration
Retouching and restoration are techniques used to remove imperfections from an image or restore an old or damaged photo. These techniques can be used to remove blemishes, scratches, and dust from an image, or to restore an old photo that has faded or been damaged over time.
To retouch an image, use the Clone Stamp tool or the Healing Brush tool. The Clone Stamp tool allows you to duplicate a part of an image and apply it to another part of the image. This tool is useful for removing blemishes, scratches, and other imperfections. To use the Clone Stamp tool, select it from the toolbox, and then hold down the Alt key while clicking on the part of the image you want to duplicate. Then, use the tool to apply the duplicated image to the area you want to retouch.
The Healing Brush tool is similar to the Clone Stamp tool but is more advanced. It works by blending the texture and color of the surrounding area with the area you want to retouch. This tool is useful for removing more complex imperfections, such as wrinkles or scars. To use the Healing Brush tool, select it from the toolbox and then select the area you want to retouch while holding down the Alt key. Then, use the tool to apply the retouched area to the part of the image you want to edit.
- Adding Text and Graphics
Adding text and graphics is an excellent way to personalize and enhance an image. With Photoshop, you can add text, shapes, and other graphics to an image on a separate layer, allowing you to edit and adjust them independently.
To add text, select the Text tool from the toolbox and click on the image where you want to add the text. You can then type in the text and adjust its font, size, color, and other properties from the Options bar at the top of the screen.
To add shapes, select the Shape tool from the toolbox and choose the shape you want to add. You can then click and drag on the image to draw the shape, and adjust its color, size, and other properties from the Options bar.
- Using Filters and Effects
Filters and effects are fun ways to add style and creativity to your images. Photoshop includes a wide range of filters and effects that you can apply to your photos to achieve a specific look or mood.
To apply a filter or effect, select the layer you want to apply it to and then go to the Filter menu. Here you can choose from a variety of filters and effects, such as Blur, Distort, or Stylize. You can adjust the settings of the filter or effect to achieve the desired look.
- Saving and Exporting
Once you have finished editing your photo, it is essential to save and export it in the appropriate format. Saving an image in Photoshop creates a .psd file that can be edited later in Photoshop. However, to share or use the image outside of Photoshop, you will need to export it in a different format.
To save an image, go to the File menu and select Save As. Here you can choose the location and format you want to save the image in. For example, you can save the image as a JPEG, PNG, or GIF.
To export an image, go to the File menu and select Export. Here you can choose the format you want to export the image in, as well as adjust the settings for that format. For example, if you want to export the image for use on the web, you can choose the JPEG format and adjust the image quality to reduce file size.
Conclusion
Photoshop is a powerful tool that can help you take your photo editing skills to the next level. With its wide range of tools and features, Photoshop provides users with the ability to enhance, manipulate, and create images with incredible precision and control. By mastering some basic techniques and tools, such as cropping, adjusting color and contrast, working with layers, retouching and restoration, adding text and graphics, using filters and effects, and saving and exporting, you can create stunning images that areworthy of any professional photographer or graphic designer. While it can be intimidating to learn at first, with practice and patience, you can become proficient in using Photoshop to edit your photos like a pro.
Remember that while Photoshop is a powerful tool, it is only as effective as the person using it. The key to achieving great results is to take the time to understand the tools and techniques, and to experiment and practice until you become comfortable with them.
If you’re just getting started with Photoshop, don’t be afraid to explore and experiment. Start with simple edits, such as adjusting brightness and contrast, and gradually work your way up to more advanced techniques. Take advantage of online tutorials, forums, and other resources to learn new tips and tricks.
Finally, keep in mind that the goal of photo editing is not to create a perfect image but to enhance and bring out the best in the original photo. So don’t be too hard on yourself if your edits don’t come out exactly as you intended. With time and practice, you’ll develop the skills and confidence to create amazing images that you can be proud of.
Photoshop is an incredibly powerful tool that can help you take your photo editing skills to the next level. By mastering some basic techniques and tools, you can enhance your photos, manipulate them with incredible precision and control, and create stunning images that are worthy of any professional photographer or graphic designer. So why not give it a try? Who knows, you might discover a new passion for photo editing!


